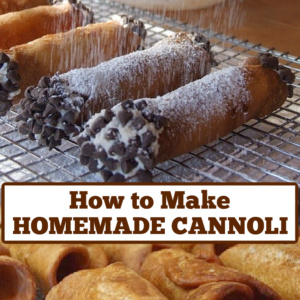
I’m sharing how to make homemade cannoli with many step by step photos. The shells are homemade and the filling is too!

Italian-made cannoli can be counted among my all-time favorite desserts in this world to create a sweet ending for a pasta dinner. I had my fair share of them on my trips to Italy, and I have enjoyed pretty decent cannoli at both Mike’s and Modern in the North End of Boston. It’s quite a project to make them at home, but if you enjoy cooking then you’ll probably enjoy the process as much as I did.
Tips for making cannoli:
- Vanilla extract may be substituted for the Grand Marnier.
- Metal cannoli tubes can be ordered online, but they can also be found in well-stocked cooking stores.
- You will need a deep fry thermometer to measure the temperature of the oil.
- A pasta rolling machine isn’t a must to make the cannoli dough, but it makes it much easier to get nice, thin dough.
- Cannoli shells can be made a day or two in advance. Store in a sealed plastic container.
- Flavor will make a difference if you use really good quality ricotta and mascarpone cheese.
- If you cannot locate mascarpone cheese, you can substitute cream cheese.
- And, if you want to make this really, really easy… purchase some ready-made cannoli shells at a good Italian deli, and fill them with this delicious filling.

How to make Homemade Cannoli:
The full, printable instructions are at the end of this post.
The making of the cannoli dough is a snap. Just combine the ingredients together, form into a ball and refrigerate the dough for a couple of hours.
At this point, you can make the filling too. My filling consisted of fresh ricotta and imported mascarpone cheese from our city’s Little Italy. Hint: you can find mascarpone cheese at your local market! The cheeses are mixed with Grand Marnier, cinnamon and powdered sugar. The filling should also chill for a while.
I really, really wanted to use authentic wooden dowels to make the cannoli shells. And by authentic, I mean cutting up my own wood, sanding it down, seasoning it and frying the shells wrapped around the wood. I didn’t get around to doing that. So I bought the metal cannoli tubes, which was a fine alternative.
At this point, you can prepare the oil. Pour it into a deep sauté pan (a couple of inches), dip your metal cannoli tubes into the cold oil and let them drain on a rack. Heat the oil to 350 degrees F. I used my cast iron pan. Be careful with the temperature. If it’s too hot, the shells will burn, and if it’s too cool the cannoli will turn out soft and greasy.
Divide the chilled dough into 4 pieces. Roll out one piece at a time on a floured surface. You can roll out the dough by hand, but if you have a pasta machine, you might have better luck with getting the dough as thin as you need it. I rolled out the dough first and then ran it through the pasta attachment on my KA Mixer. The first few times it will come out looking kind of cruddy.
Keep folding it and running it back through until it comes out smooth and thin. The #4 setting on my KA attachment was perfect for me.

You’ll need to cut out circles that are about 4-inches in diameter. I used an oh-so-fancy plastic container.
Don’t worry about the scraps. They can be re-rolled many times. The dough is very easy to work with. Just add flour if it starts getting sticky.
Wrap the dough gently around the oiled cannoli tube. Brush on a little bit of egg white to seal the edges.

Check the temperature of your oil to make sure it’s darn near 350 degrees (trust me). Lower the cannoli gently in the hot oil and let sizzle until golden brown and crispy (about 2 minutes).
Remove the fried cannoli shells to a rack to let cool and drain for a few minutes. I folded up a paper towel and wrapped it around the metal part while I gently urged the shell off of the tube. I didn’t have any problems with the shell sticking to the tubes.
The shells can be made up to a couple of days in advance. Just make sure they’re kept in a covered container and they should stay nice and crispy.
Place the filling in a piping bag or a large zip baggie with the corner snipped. It does not have to look fancy since you’re just going to be dipping the edges in something decorative. Hold the shell in one hand and pipe the filling in the other. Be gentle- the shells will be somewhat delicate.
Don’t fill your shells until a few hours before serving. If you fill them too far ahead, the shells will begin to absorb the moisture from the filling and lose their crunch.
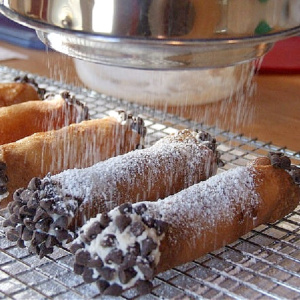
Dip the edges in mini chocolate chips (or chopped pistachios, candied orange peel, etc… get creative!).

Sift powdered sugar on top to finish them off. Enjoy!
Notes:
*This is not an easy project and it is time-consuming, but I do have to say that it is fun. It’s a good learning experience and something I’m glad I experienced.
I made two batches of the cannoli shells. The first shells I made were a bit too thick and not quite crispy enough. With the second batch, I made sure to roll the dough very thin, and I cooked the shells for a full two minutes- much better!
Cannoli
Ingredients
CANNOLI SHELLS:
- 2 cups all-purpose flour
- 2 teaspoons granulated white sugar
- ½ teaspoon ground cinnamon
- 1 pinch salt
- 2 tablespoons shortening (or butter), melted
- ¾ cup sweet Marsala wine
- 1 large egg white
FILLING:
- ¾ cup whole milk ricotta cheese, drained overnight with cheesecloth and squeezed dry
- ¾ cup mascarpone cheese
- ¼ cup powdered sugar
- ½ teaspoon Grand Marnier
- ½ teaspoon ground cinnamon
- 1 pinch salt
FRYING AND FINISHING:
- canola or vegetable oil
- mini chocolate chips, chopped pistachios, candied orange peel or chopped chocolate, your choice
- powdered sugar, optional
Instructions
MAKE THE CANNOLI SHELLS:
- Combine the dry ingredients and mix in the shortening/butter and Marsala until you get a stiff, smooth dough. Form the dough into a ball, wrap with plastic wrap and refrigerate for 2 to 3 hours.
- When you're ready to make the shells, place enough oil in a fry pan so that the cannoli shells will be able to be covered completely when frying. Dip each of the metal cannoli forms in oil and set on a rack. Heat the oil to 350°F. You'll need to use a thermometer because it's important that the oil is right around that temperature. Too hot, and you'll burn the shells. Too cool and the shells will turn out greasy and soft.
- Remove the dough from refrigerator and divide it into four pieces. Start with one piece and roll it out on a floured surface until very thin- as thin as you can get it without having it tear apart. If you have a pasta rolling machine, roll it through several times until it is smooth and thin. (On my KA pasta machine attachment, I used #4 on my machine.)
- Once your dough is rolled out, cut out 4-inch circles. I used the top of a plastic bowl that had a 4-inch diameter and it worked just fine. Wrap the cut cannoli dough around the metal form and brush the edges with egg white to seal.
- Use tongs to set it in the heated oil. Let it fizzle for about 2 minutes, watching that it isn't getting too dark. Remove with tongs and set on rack to drain. Let cool a bit and then carefully slip the shell off of the form. They will be thin and crispy, so you'll need to do so carefully, perhaps using folded up paper towels to help wiggle it off the form.
MAKE THE FILLING:
- Mix the filling ingredients together. Cover and refrigerate until ready to use (at least a couple of hours).
- When ready to fill the cannoli (you should do so only a few hours before serving- if you fill them too far ahead, they will begin to get soggy), place the filling in a pastry bag with a wide tip opening (or simply a freezer zip bag with the corner snipped off).
- Hold a cannoli shell in one hand and the squeeze the bag in the other. Gently squeeze the filling into both ends of the shell to fill it. Let the filling come out of each end a little bit.
- Edge the cannoli with desired decor... mini-chocolate chips, chopped chocolate, chopped pistachio, etc. Remove to a platter and repeat with remaining shells. Keep refrigerated until ready to serve.
- When ready to serve, give the cannoli a sprinkle of powdered sugar on top if you wish.
Notes
- Vanilla extract may be substituted for the Grand Marnier.
- Metal cannoli tubes can be ordered online, but they can also be found in well-stocked cooking stores.
- A pasta rolling machine isn't a must to make the cannoli dough, but it makes it much easier to get nice, thin dough.
- Cannoli shells can be made a day or two in advance. Store in a sealed plastic container.
- Flavor will make a difference if you use really good quality ricotta and mascarpone cheese.
- If you cannot locate mascarpone cheese, you can substitute cream cheese.
- And, if you want to make this really, really easy... purchase some ready-made cannoli shells at a good Italian deli, and fill them with this delicious filling.
Nutrition
Nutrition information is automatically calculated, so should only be used as an approximation.


Love Mikes cannolis. How long can cannoli filling be kept in refrigerator? Can I freeze the filling? I received a cannoli kit for 10 canollis and we can not eat them all right away. How do you suggest wa keep the filling?
Thank you
I found this on Google >> To freeze cannoli filling, pour it in a freezer-safe plastic bag or container and seal it tightly. … The filling remains safe indefinitely in the freezer, but quality declines quickly after a few weeks. To use the filling, thaw the container in the refrigerator overnight.
Hi there! Do you have any suggestions for flavoring the filling? I was hoping to make it chocolate, but I’m not sure how much cocoa powder I should add. Thanks!!
I’m not sure. Google around though, and I’m sure you’ll find a chocolate cannoli filling recipe somewhere!
i am just 12 but i an making this as a surprise for my dad thanks for the resipie!!!!!!!!!!!!!!!!!!!!!!!!!!!!!!!!!!!!!!!!!!!!!!!!
Hello,
I made these today. Homemade shells and all. I also made one batch following the recipe for the filling exactly and one using part skim ricotta and truvia in place of the powdered sugar.
I will say I thought the cinnamon added a flavor to the filling that was not completely pleasant to me, and seemed to make the filling grainy?
It was also not as sweet as some other cannoli I have had.
On the positive side the recipe was extremely easy to follow and made perfect sense. Every step was outlined beautifully. I will link my post to this one as soon as I write it. 🙂
hi what is marsala.
Marsala Wine
Lori,
Thanks for sharing such a well documented, step-by-by recipe for cannoli. Only 1 question: what size (w/ respect to the diameter) of cannoli tubes did you purchase? I ask because when I went to purchase a set on-line, there are various sizes available. Also, your recipe predicts around 16 cannoli & if one uses a larger diameter tube than you did, then the results won’t be the same. Thanks so much again.
5.8 x 1 x 1 inches
Such as this one: http://www.amazon.com/Norpro-3660-Stainless-Steel-Cannoli/dp/B000LBU1VQ/ref=sr_1_1?ie=UTF8&qid=1327882351&sr=8-1
Hi Lori, I was looking for a quick and easy recipe for the cannoli shells and I found it on your website! The only thing left is trying them…. thank you for sharing, your website is great!
Not going to lie, I bought cannoli shells from the Italian general store here in Mpls, however I was looking for a recipe that used both marscarpone and ricotta (simply because I have had marscarpone in the fridge for awhile and wanted to use it.) It was surprising to find, via my internet search, that many people don’t use both cheeses. I wonder why–I should think the marsc would add flavor to it and make the cannolis more rich? Either way, I’ve very glad to have found your recipe! The filling tastes great, but I’m waiting until dinner to serve them! Thanks again!
Is there a substitute for the alcohol?
Memoria, I don’t know of one, but I’m sure you could easily find another cannoli dough recipe on the internet that does not have the Sweet Marsala in it. As far as the filling, you don’t have to use Grand Marnier… you can use vanilla extract instead.
I looked and couldn’t find a recipe without the alcohol. I don’t usually carry alcohol on hand. Would it be weird or doable to substitute the wine with another liquid like say apple or grape juice?
@ashzab, I’ve never subbed, but you could certainly try it.
Use real vanilla flavoring