There’s something about fall that makes me want to turn everything into a pumpkin treat. These Pumpkin Cake Pops are the cutest little bites of autumn joy — sweet, spiced, and coated in a creamy shell of chocolate. Whether you’re making pumpkin desserts for Halloween, a fall bake sale, or just to celebrate pumpkin season, these cake pops are bound to make everyone smile.
What Are Pumpkin Cake Pops?
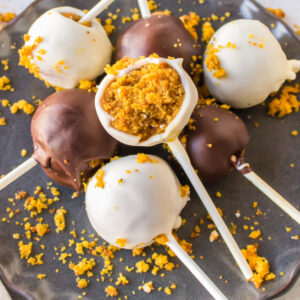
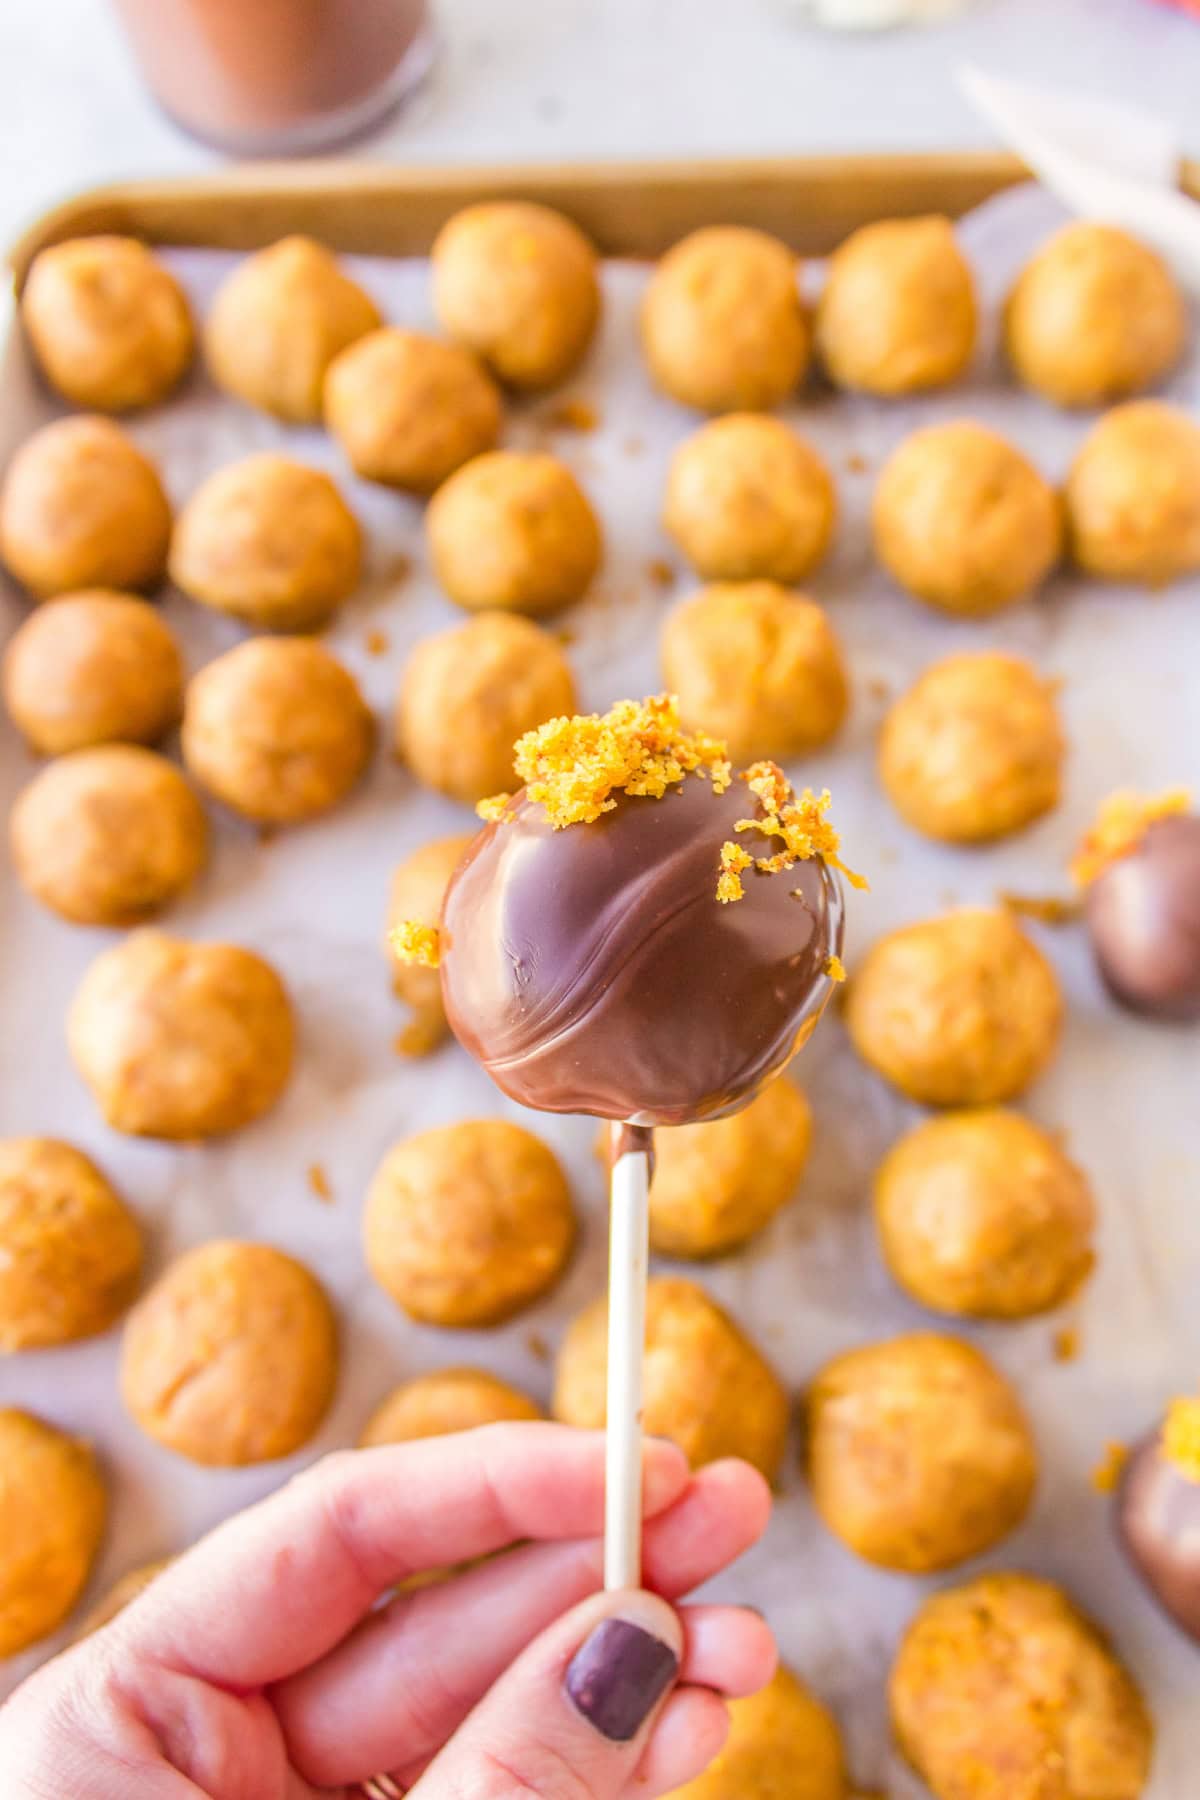
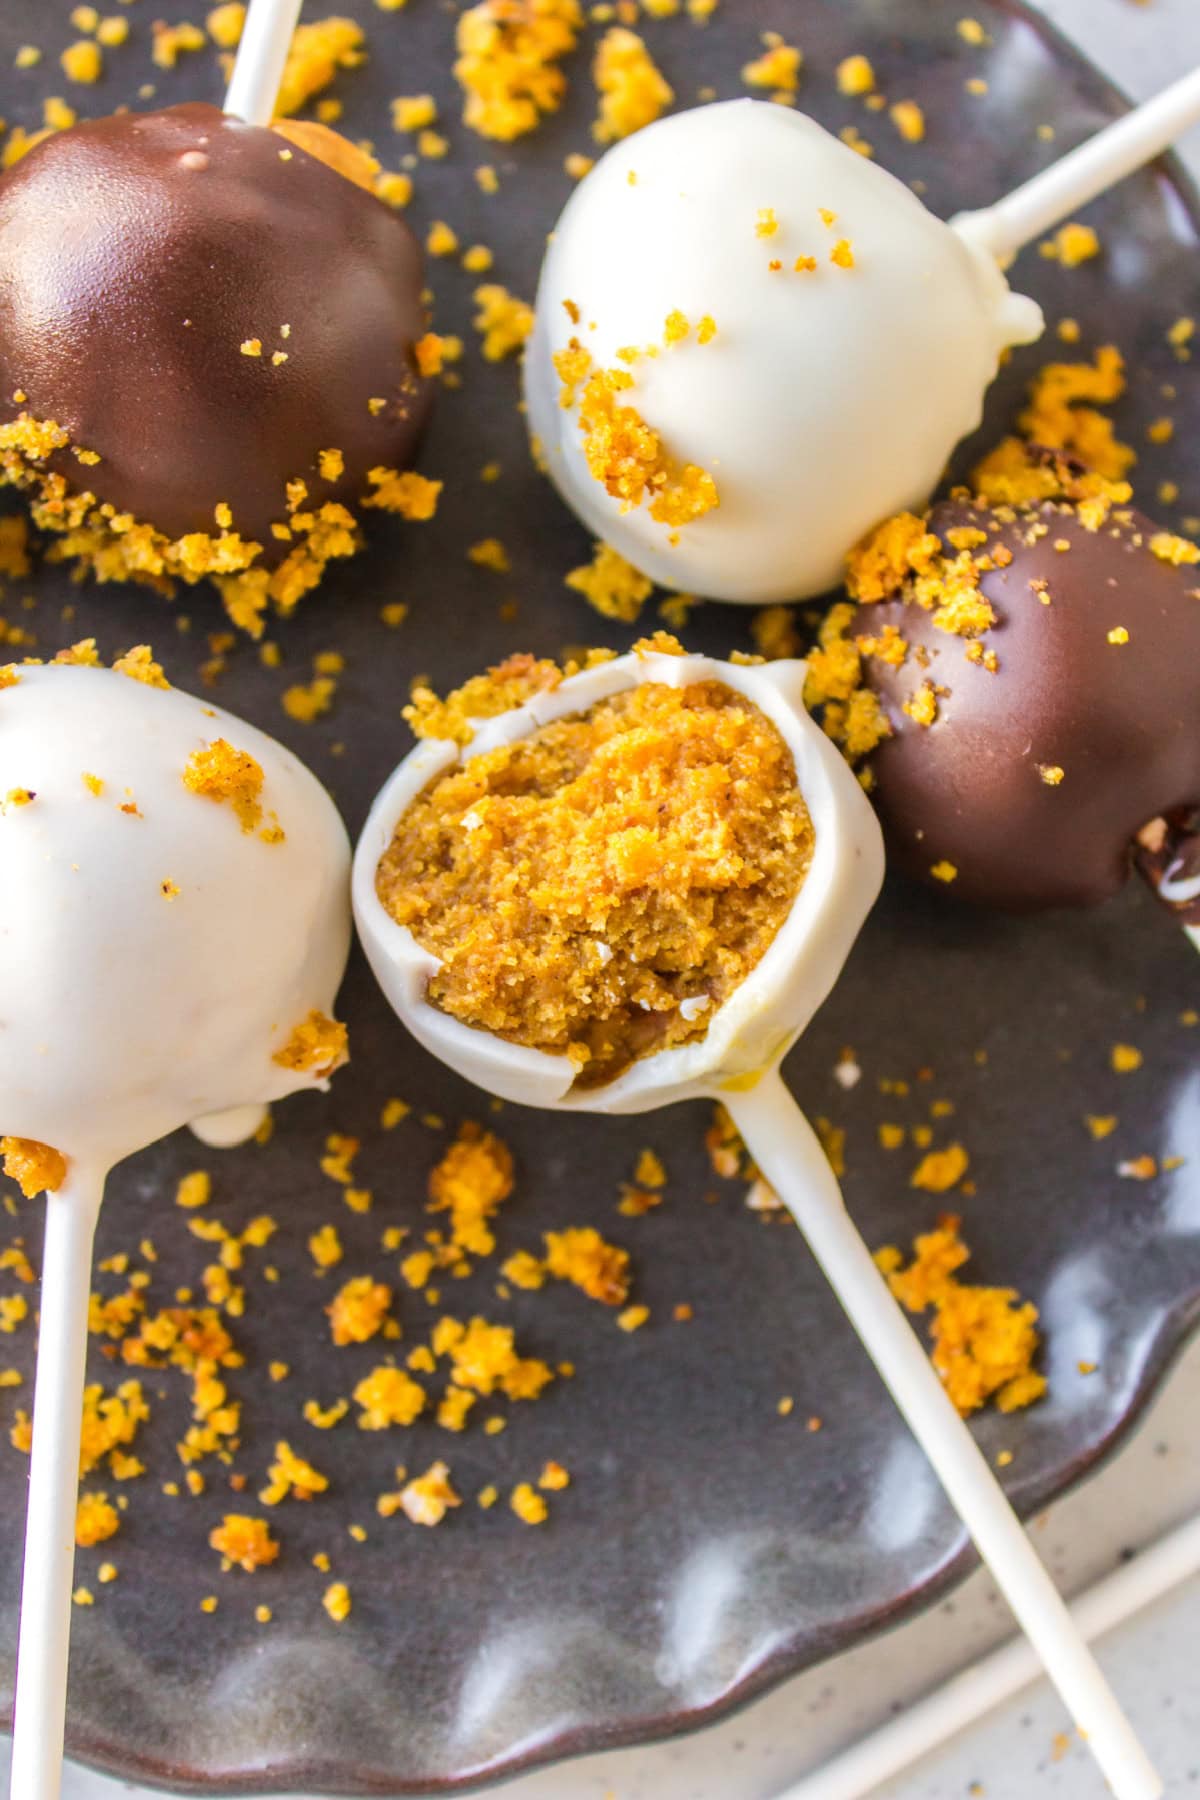
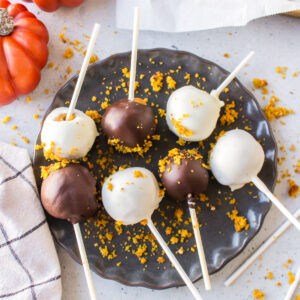
Pumpkin cake pops are made by baking a tender pumpkin-spice cake, crumbling it up, and mixing it with white frosting before rolling it into bite-sized balls. Each one is dipped in chocolate or candy coating, decorated festively, and served on a stick — kind of like a portable truffle-meets-cupcake.
They’re the perfect mix of nostalgic and modern — a little whimsical, a little gourmet.
Why You’ll Love This Easy Cake Pop Recipe:
- Pumpkin + spice + everything nice. The warm cinnamon and nutmeg make each bite taste like fall.
- Perfect for parties. Serve them on a dessert board or package them up as gifts.
- Make-ahead friendly. You can chill or freeze them for stress-free entertaining.
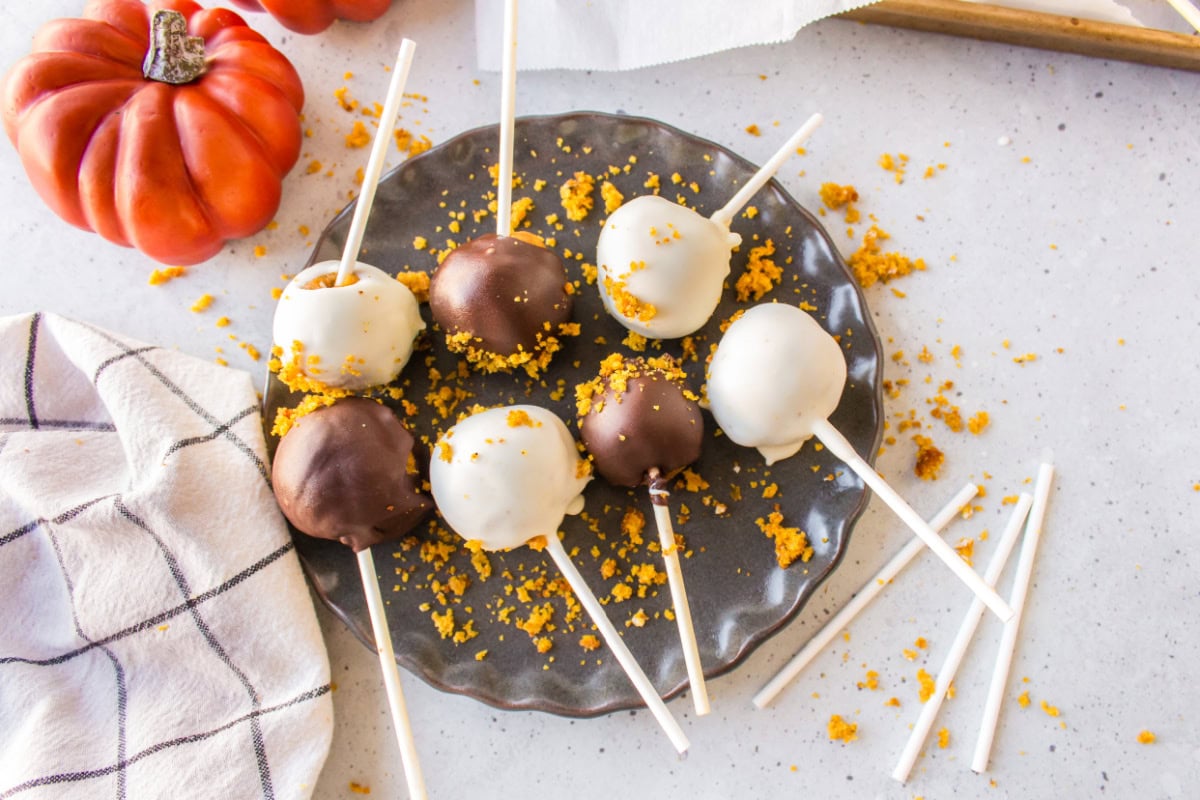
- Totally customizable. Add orange candy melts, drizzle white chocolate, or sprinkle crushed graham crackers on top.
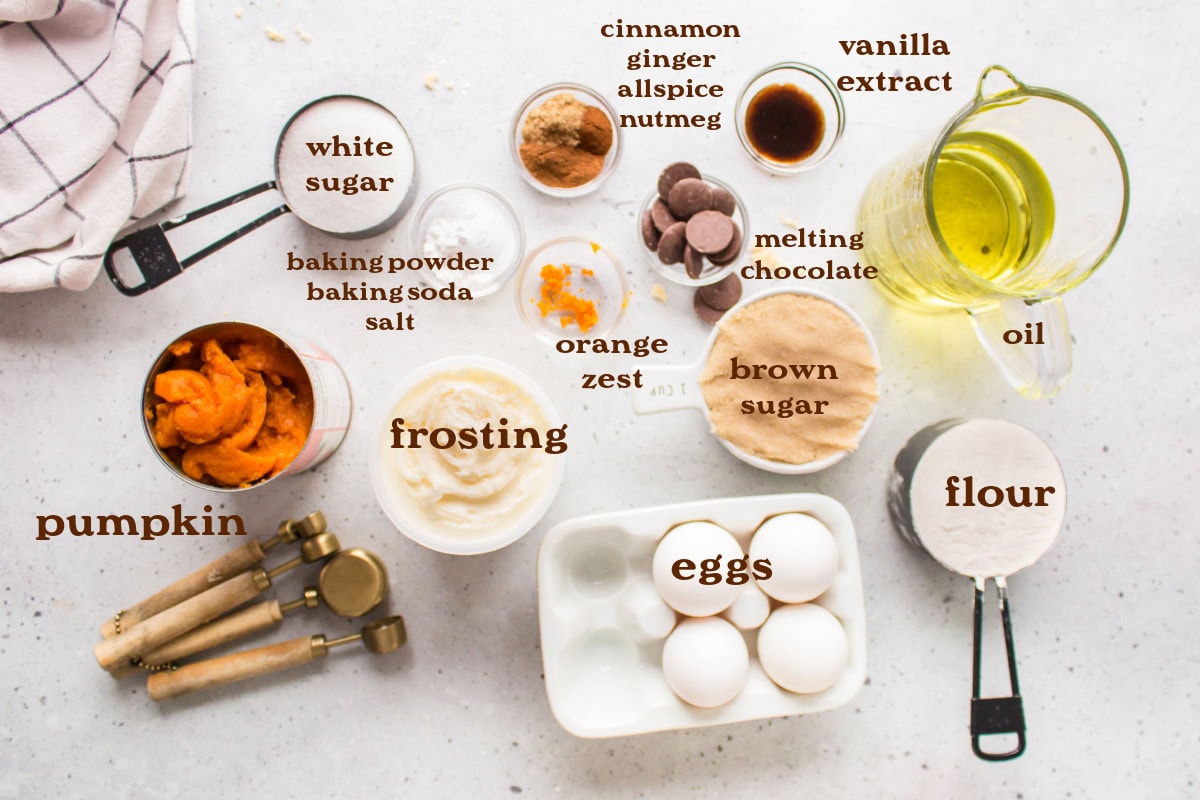
Ingredients Needed:
- All-purpose flour
- Baking powder, baking soda and salt
- Spices: cinnamon, nutmeg, ginger and cloves
- Pumpkin purée (not pumpkin pie filling)
- Eggs
- White sugar and brown sugar
- Vegetable, canola or avocado oil
- Vanilla Extract
- Orange Zest
- Cream cheese frosting (homemade or store-bought)
- Craft sticks
- White, orange or brown candy melts (for coating)
- Sprinkles or decorations
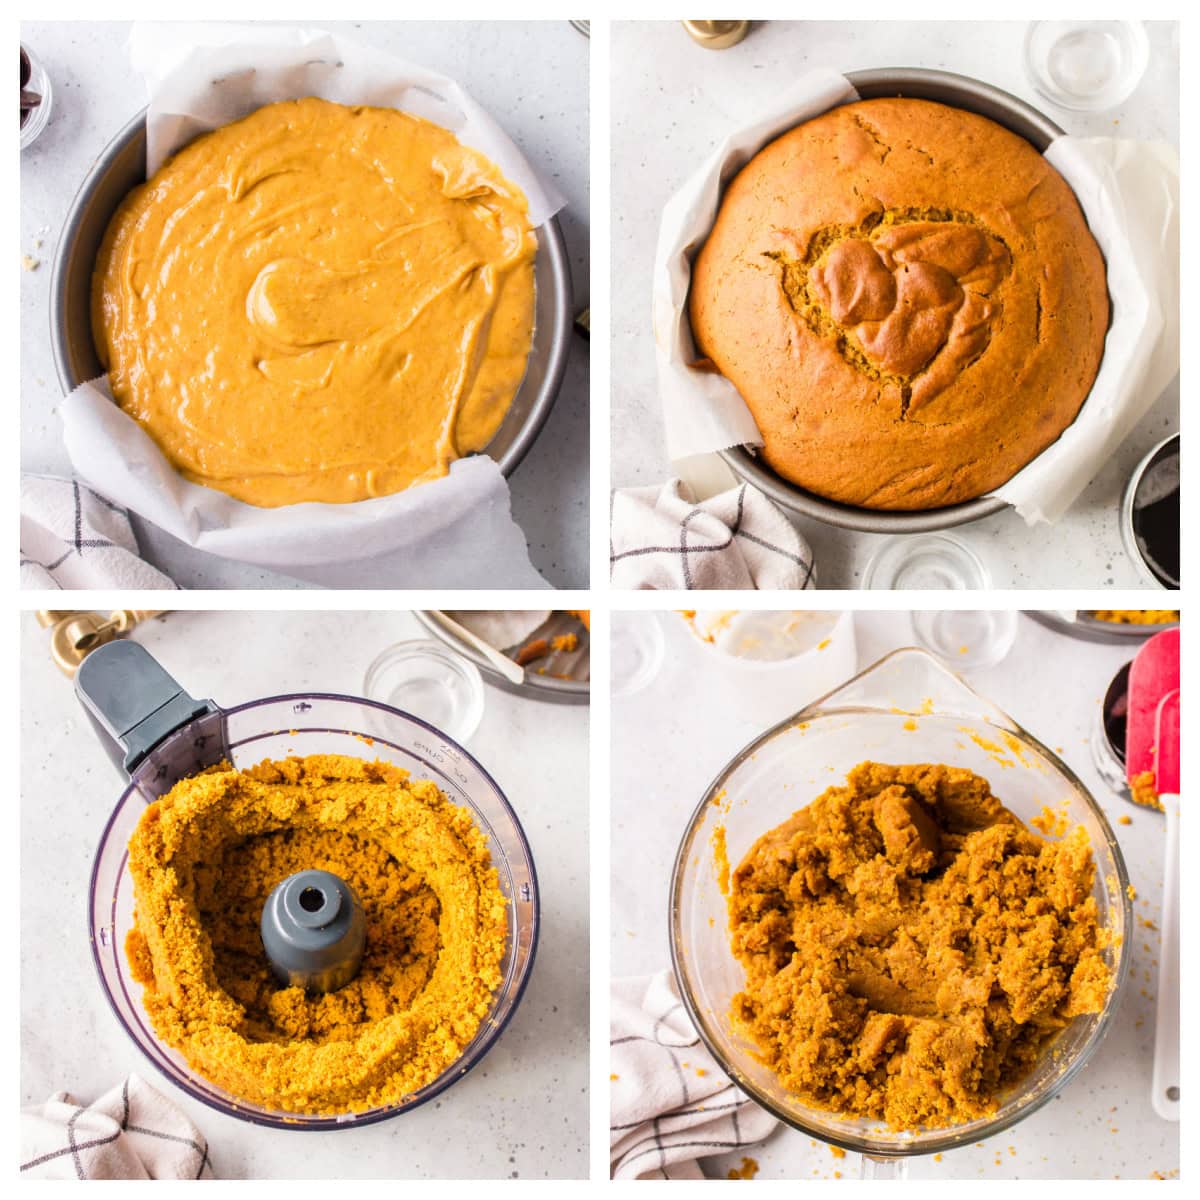
How to make Pumpkin Cake Pops
Bake the cake: Start with a simple pumpkin-spice cake. Let it cool completely.
Crumble and mix: Break the cake into fine crumbs, then mix in the frosting to form a dough-like texture.
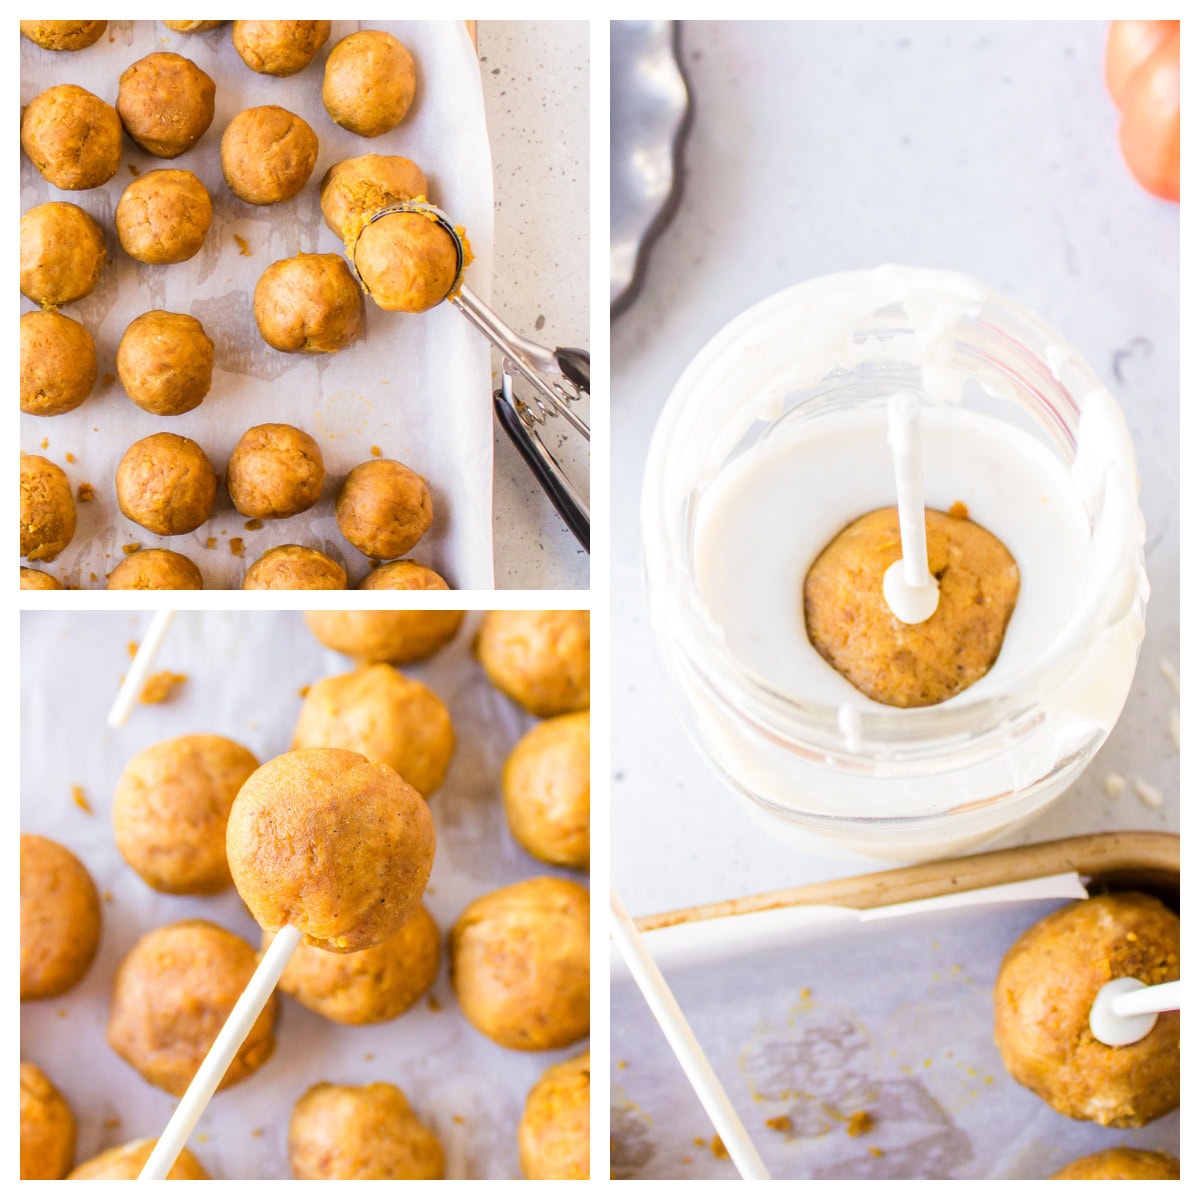
Roll and chill: Form small balls and place them on a baking sheet. Chill until firm.
Dip and decorate: Melt your candy coating, dip each cake pop, and decorate as desired.
Pro Tips
- Chill well or freeze before dipping to help them stay on the sticks.
- Thin the candy melts with a little shortening or coconut oil if they’re too thick.
- Decorate quickly! Sprinkles stick best before the coating hardens.
Fun Flavor Twists
- Pumpkin Cheesecake Cake Pops: Use cream cheese frosting and crushed graham crackers.
- Salted Caramel Pumpkin Pops: Add a drizzle of caramel sauce and a sprinkle of sea salt.
- Chocolate Pumpkin Pops: Use chocolate cake mix and pumpkin purée for a darker, richer flavor.
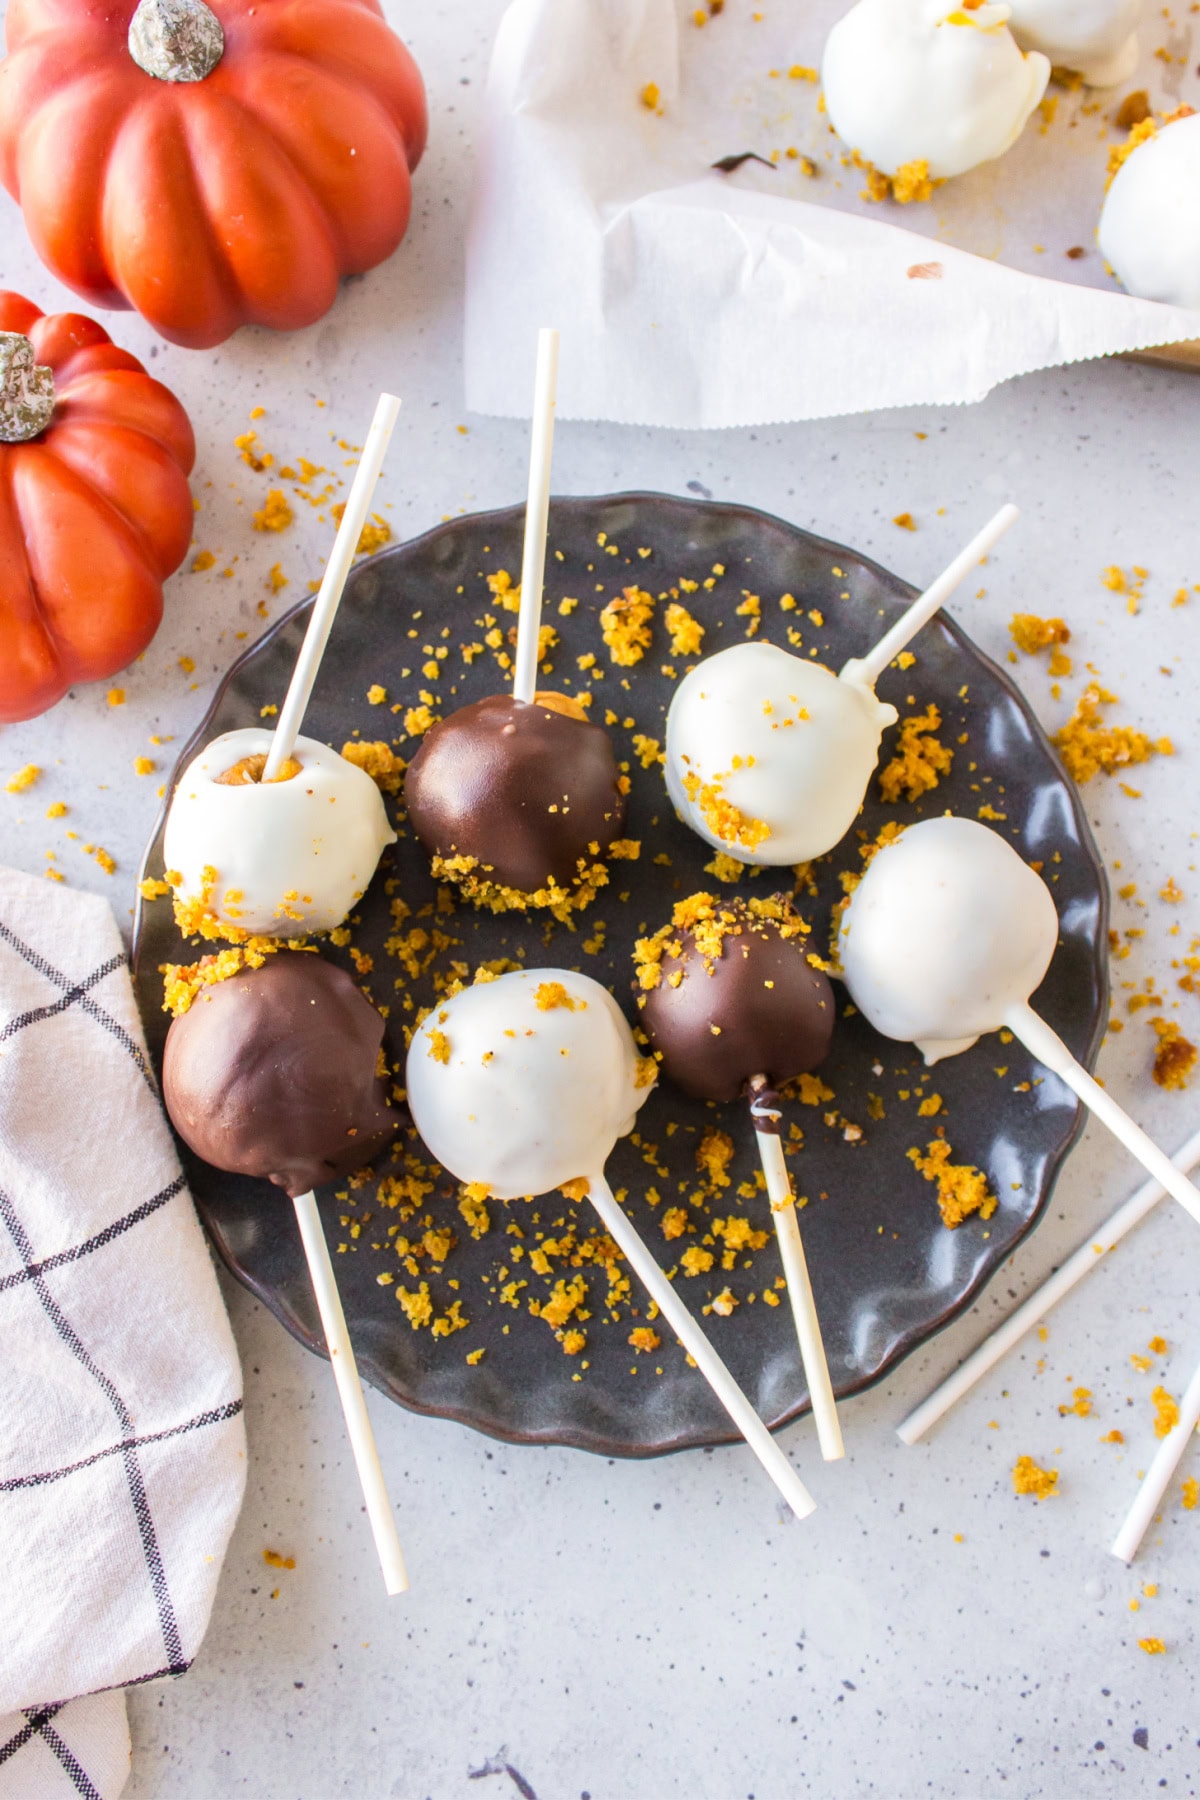
🎉 How to Serve Them
Serve these festive pumpkin treats in a decorative jar filled with candy corn, stick them into a pumpkin for a Halloween display, or wrap them individually with ribbon for gifts. They’re guaranteed to steal the show at any fall gathering.
🍁 More Fall Desserts You’ll Love
Pumpkin cake pops are proof that fall baking doesn’t have to be complicated to be fun — or delicious. These pumpkin desserts are cozy, festive, and make everyone feel like a kid again. So grab your sticks and candy melts — and get ready to pop some pumpkin joy into your kitchen!
Pumpkin Cake Pops
Ingredients
CAKE:
- 3 cups all purpose flour
- 1 tablespoon ground cinnamon
- 2 teaspoons ground ginger
- 2 teaspoons baking powder
- 1¾ teaspoons ground allspice
- 1 teaspoon baking soda
- 1 teaspoon salt
- ½ teaspoon ground nutmeg
- 1½ cups granulated white sugar
- 1 cup packed brown sugar
- 1 cup canola or vegetable oil (or avocado)
- 4 large eggs
- One 15-ounce can unsweetened pumpkin puree
- 1 tablespoon vanilla extract
- 1 tablespoon finely grated orange zest
- Two 16-ounce tubs prepared white or vanilla frosting
Instructions
PREPARE THE CAKE:
- Preheat the oven to 350°F. Butter two 9-inch-diameter cake pans and dust with flour.
- Sift flour and next 7 ingredients (through nutmeg) into a medium bowl.
- Using electric mixer, beat both of the sugars and the oil in a large bowl until combined (mixture will look grainy). Add the eggs, 1 at a time, beating until well blended after each addition. Add the pumpkin, vanilla, and orange zest; beat until well blended. Add the flour mixture; beat just until incorporated. Divide the batter between the prepared pans.
- Bake the cakes until a tester comes out clean- about 35-40 minutes. Cool the cakes on a rack.
FORM THE CAKE BALLS:
- Line a baking sheet (one that fits in your refrigerator or freezer) with parchment or waxed paper. Remove the cakes in pieces and place them in your food processor. Process to crumbs; dump the crumbs into a large bowl. Add one tub of frosting to the crumb mixture. Mix with the back of a large spoon (or your hands). Add additional frosting, as needed, until the mixture sticks easily together. Form quarter- sized balls with your hands and place onto the prepared baking sheet. Place the balls into the refrigerator and chill until firm (a shorter stay in the freezer would be okay too).
MELT THE CHOCOLATE:
- Melt the chocolate in a small glass bowl in the microwave in 30 second intervals. Keep checking and stirring. If you cook it too long, it will harden. It should take about a minute and a half for about a cup of chocolate. When using chocolate chips, I add about a half teaspoon of shortening to assist with smoothing it out. (fyi- white chocolate chips don’t melt well- for this project, I use white chocolate disks found at a specialty baking shop).
DIP THE CAKE POPS:
- You’ll need to work quickly, so make sure you have all of your decorator supplies out. A paper plate is handy to use as a ‘catcher’ for errant sprinkles. Take out your tray of chilled cake balls and set it near your workplace. Place a stick about a half inch into the melted chocolate and then gently push into one of the chilled balls. Hold the ball with your other hand to make sure that it goes in nicely and doesn’t cause it to crack. Gently dip the ball into the melted chocolate and turn quickly to coat. Work over your paper plate to quickly sprinkle decor items onto the melted chocolate. The chocolate dries pretty fast so you need to do the decor right away. Place the decorated pop back onto your baking sheet and let set. Repeat with remaining balls, and melt more chocolate as you go along.
- Pops should be stored in the refrigerator until ready to serve. These are okay to make 24 hours in advance.
Notes
- The nutritional information does NOT include the dipped chocolate or any of the added sprinkles or candies.
- *If you’d like to use ribbon for decorating, you can glue strips of ribbon and wrap them around your sticks before using. You can also use ribbon to tie bows on the sticks after decorating.
- *You can make this recipe easier by using a boxed cake mix. Simply bake up the cake as directed, process into crumbs, and mix with 1 tub of frosting.
Nutrition
Nutrition information is automatically calculated, so should only be used as an approximation.
Note: This recipe was originally published in 2008. It was edited and re-published in 2017 and 2025.


I did not use the lollipop sticks, but instead left them as cake balls. Also, I went ahead and made things a little easier by using a box of spice cake mix instead of doing it completely from scratch. Especially since all I was going to do was destroy it and mix it with cream cheese frosting anyway. I used almost two tubs of frosting which created a much mushier consistency, requiring me to chill in the fridge for a couple hours before I could form them into balls. But the result was fabulous!
@Erin, Sounds perfect!
I am making these for a baby shower. Dipping in pink and chocolate wafers. To match the pink and brown polka dot theme. I want to serve these, pop up, tied with a ribbon bow to resemble a baby rattle. Got any ideas on how to serve.
@Fran McClain, I’ve thought about serving them upright before. I think you need to consider foam- perhaps getting a big block of it and securing it somehow to a surface. Then you can work on covering it and sticking the sticks into the foam so they’re upright. Good luck!
Did have the same idea. Think I will try it. Will let you know the outcome.
Serving idea Worked well. Will try to send a picture when I get them loaded on my computer. They were a big hit—am making again for a boy shower, using blue and brown. Made them with Devil’s Food Cake and Milk Chocolate icing.